Managing Users, Groups, and Project Access
Role-based access control (RBAC) lets your authorized TruEra administrators assign permissions to your users based on their role within your organization.
Platform-supported roles comprise:
- System User – granted the most basic permissions unless/until appropriately promoted
- Group User – consists of two or more existing system users assigned to a group
- Group Admin – group member promoted by a TruEra admin to manage the addition/removal of group members
- Project Owner – user assigned ownership of a TruEra project, with the authority to:
- – grant user access to the project
- – promote a project user to owner
- – remove a project user from the project
- – add a group to the project
- – promote a group to project owner
- – remove a group from the project
- – delete the project
- Admin – responsible for managing user roles within a TruEra deployment, with the authority to:
- – add/approve a new user
- – promote a user to the project owner role; change the project's ownership
- – promote a user to the admin role
- – demote an admin, removing their admin permissions
- – create a group and add users to it
- – promote a group to project owner
- – delete a project
- – remove a user or another admin from the platform
Heads-up
Although any active user on the TruEra Platform can create a project, there can be only one Project Owner per project.
Managing System Users and Groups
System Users are granted general access to your TruEra deployment. Project Collaborators, by contrast, are granted permissions related to a specific project (see Managing Project Collaborators.
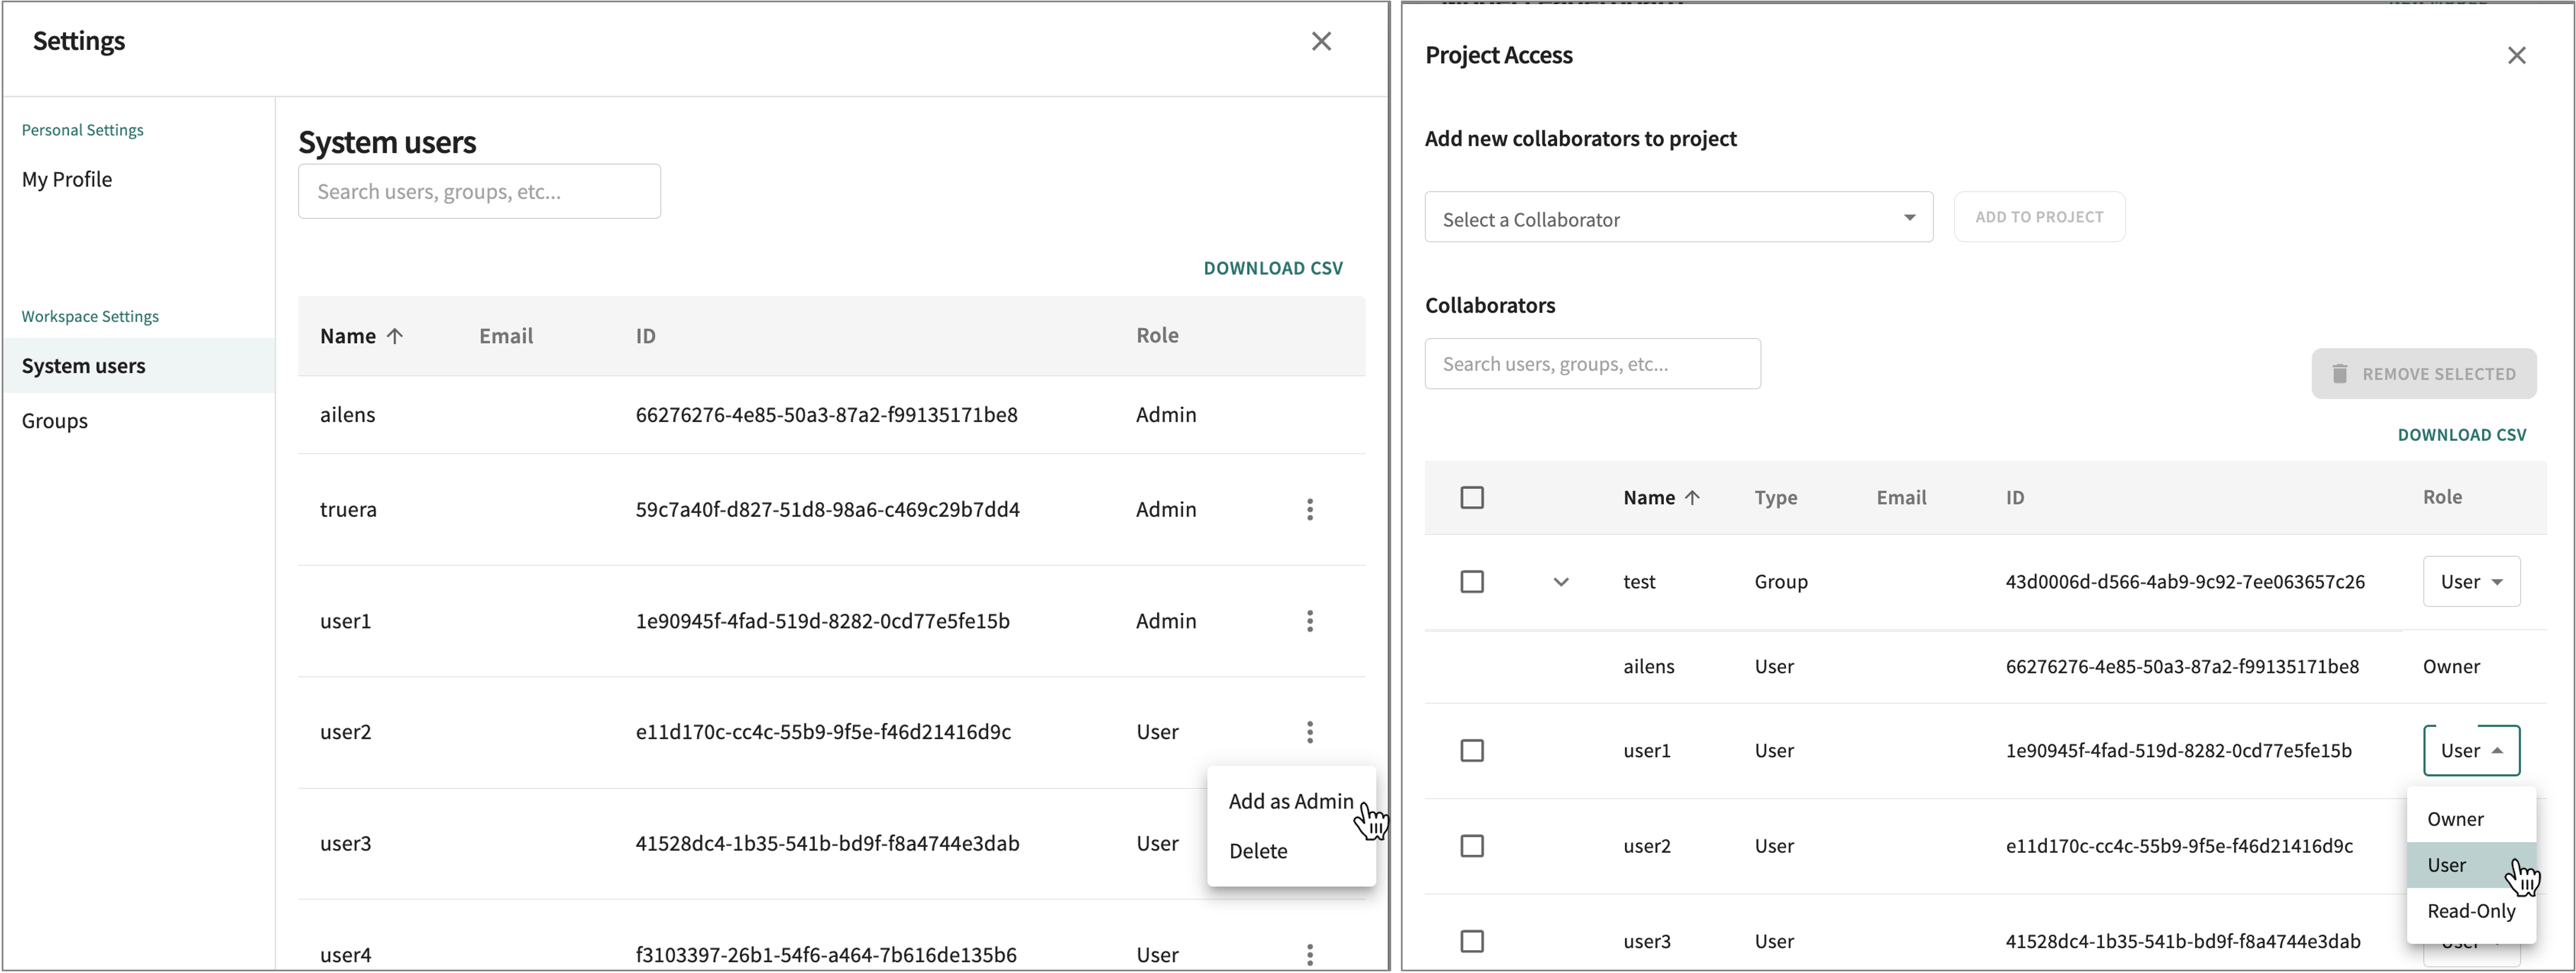
To view or change system-level roles, click your avatar at the upper-right of any Web App page and select Workspace Settings.

Adding a New System User
Only an authorized platform user assigned to the Admin role can add a new system user. If you have Admin privileges, open Workspace Setings, then scroll down to Add new system user.
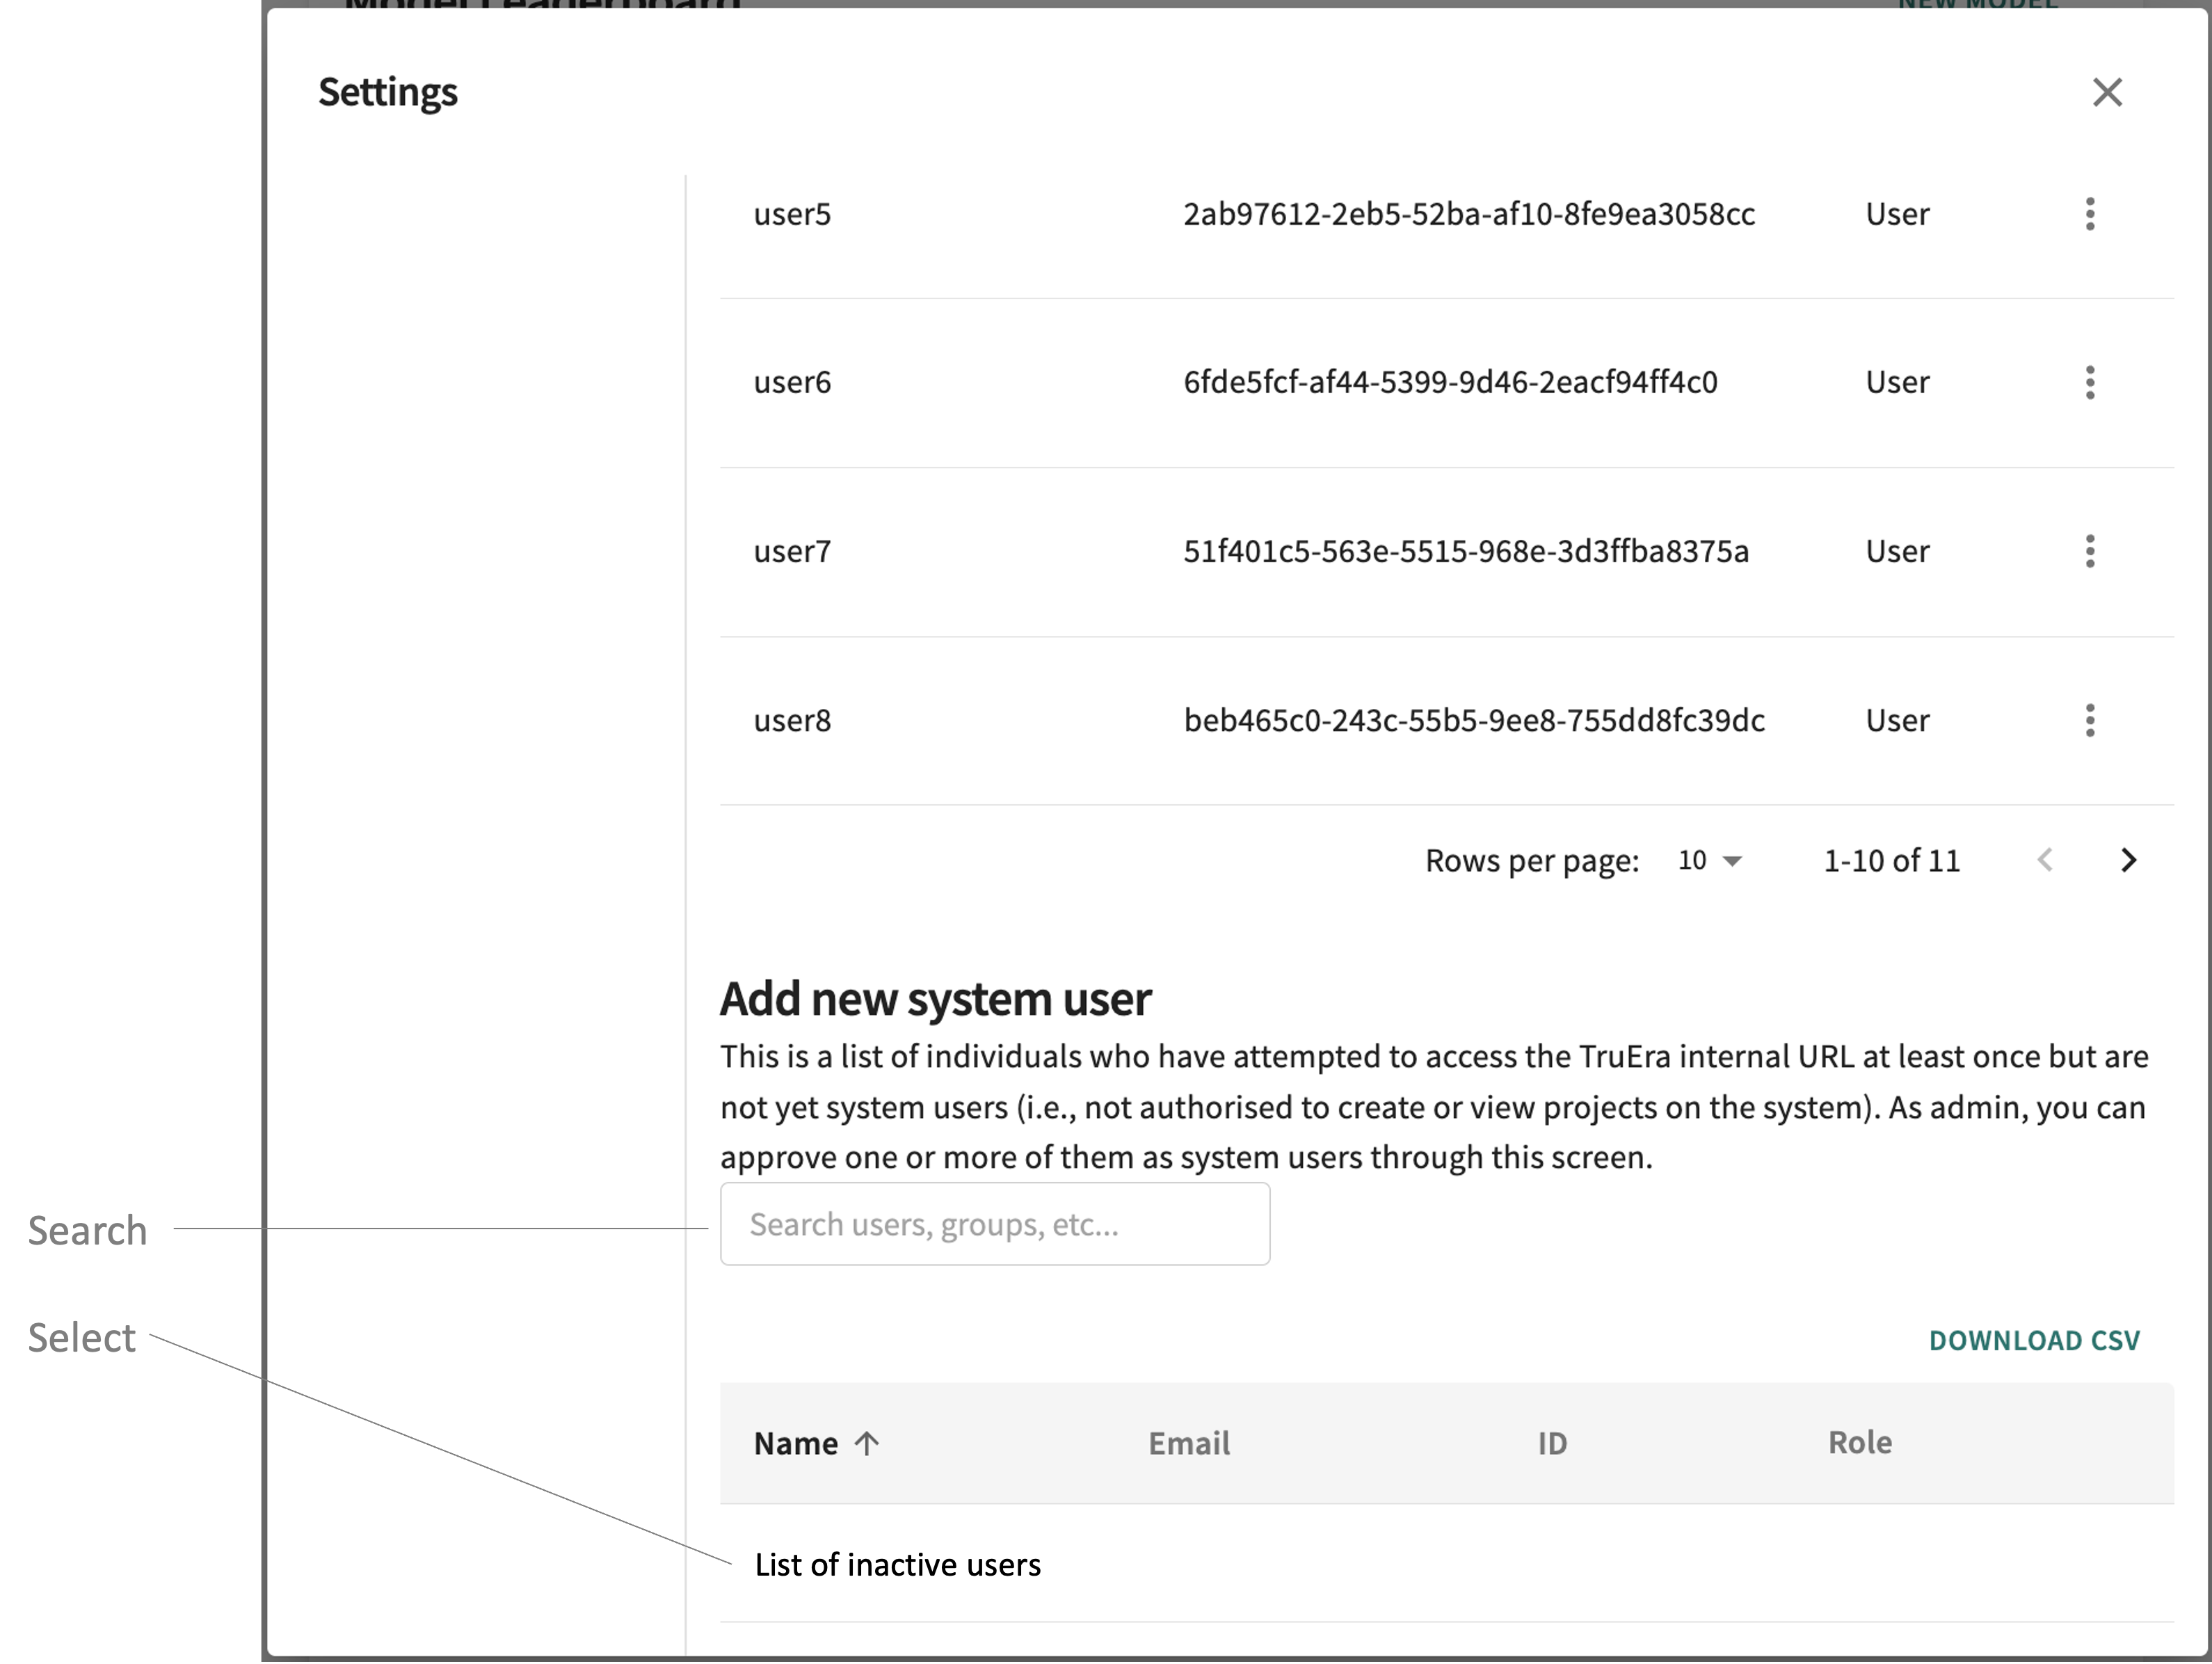
Here, as indicated, you'll see the current list of individuals who have attempted to access your TruEra deployment at least once but are not yet system users authorized to create or view projects in the system.
Select an inactive user by clicking the desired name in the list or enter a partial or full search string in the Search users, groups, etc... input field.
Tip
Click DOWNLOAD CSV to export a CSV list of inactive users for offline evaluation.
Once added, the new system user joins the list of current System Users, which can be sorted by Name, Email, or User ID. The User role is assigned to all new system users by default.
Promoting or Deleting a User
From the list of active System users, find and select the user, then (a) grant Admin permissions, (b) revoke Admin permissions, or (c) delete the user from the system.
To grant Admin rights to an existing system user:
- Click the in the far right column of the desired user and select Add as Admin.
- Confirm or reject the action.
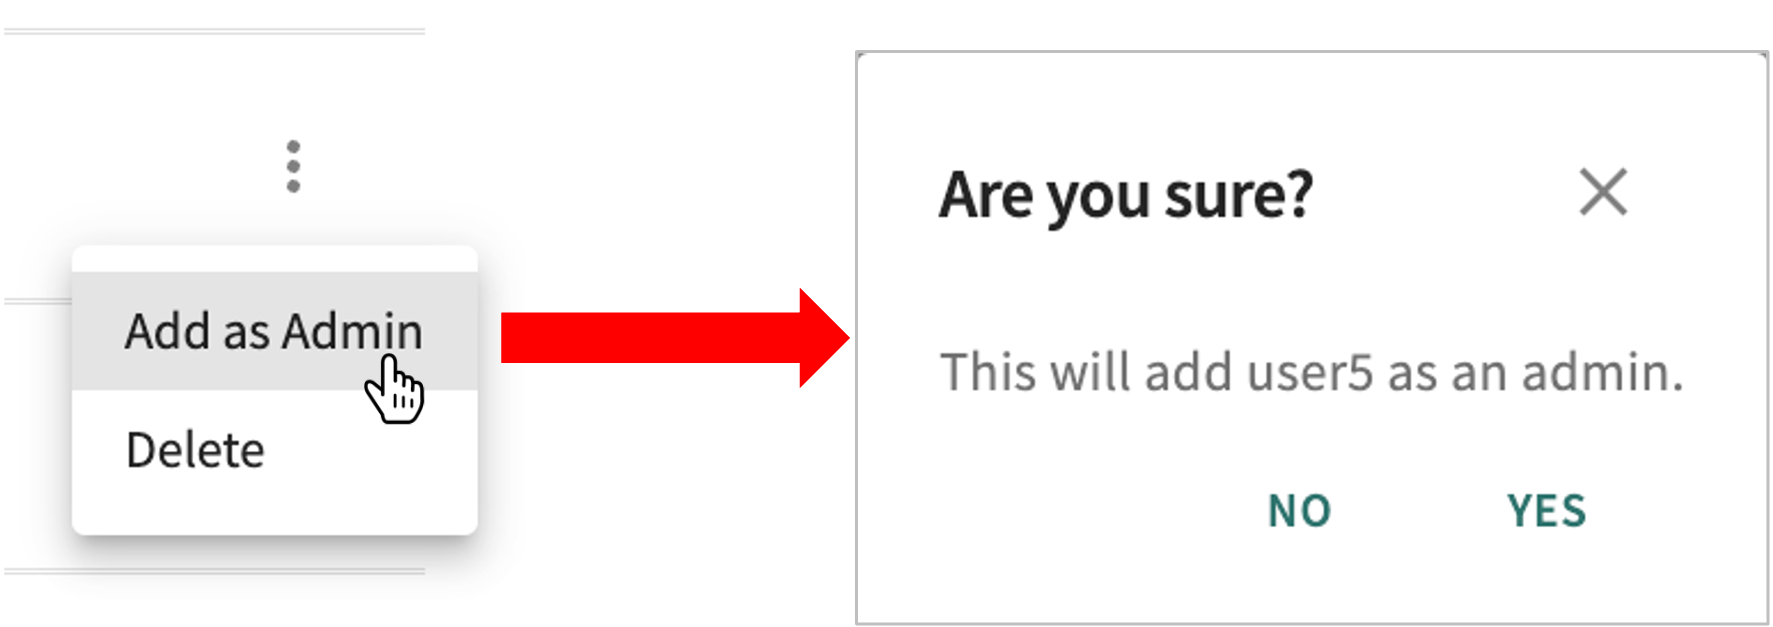
Once confirmed, the change in the user's role from User to Admin is reflected in the Role column.
To revoke Admin permissions:
- Click the in the far right column of the desired Admin and select Remove as Admin.
- Confirm or reject the action.
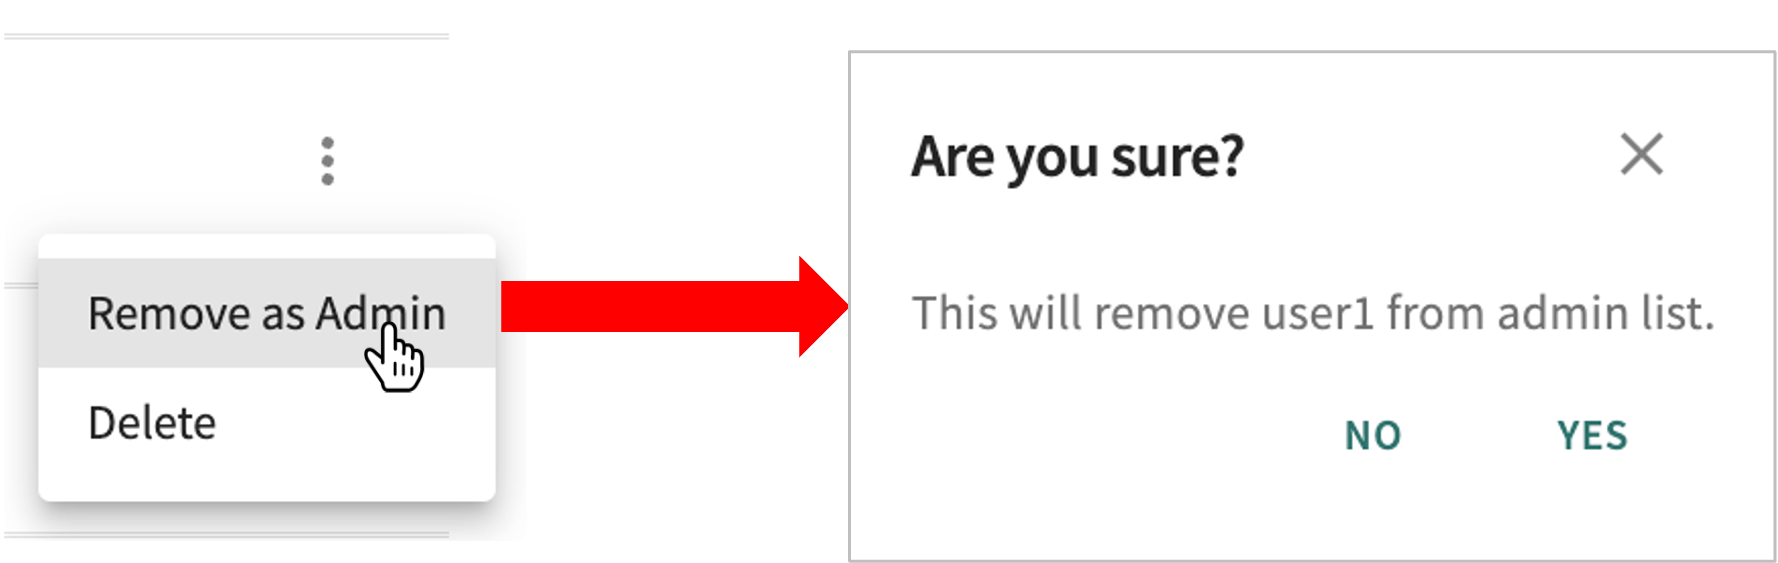
When confirmed, the change in role from Admin to User is reflected in the Role column.
To delete an existing system user (i.e., demote to a staged/inactive user):
- Click the in the far right column of the desired User, then select Delete.
- Confirm or reject the action.
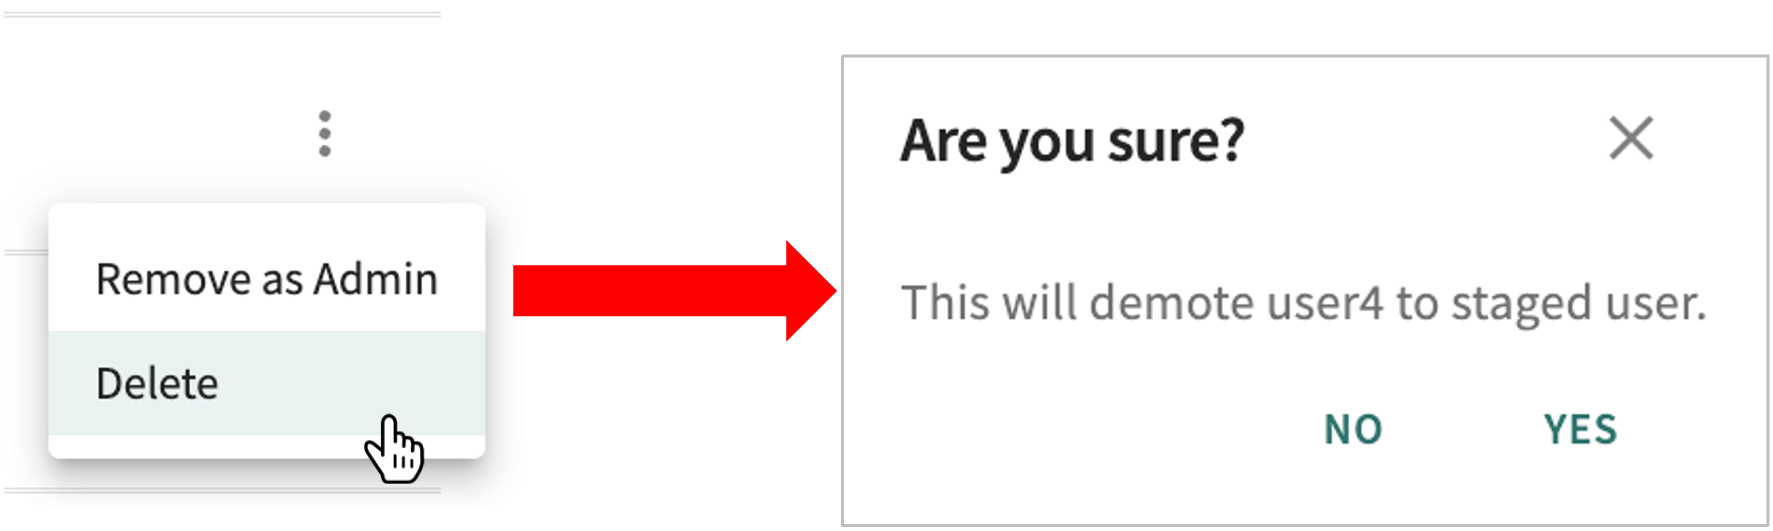
When confirmed, the deleted user is demoted to "staging" and will appear in the Add new system user candidate list.
Adding a New Group
To add a new group, click Groups under Workplace Settings, then click the + NEW GROUP button.
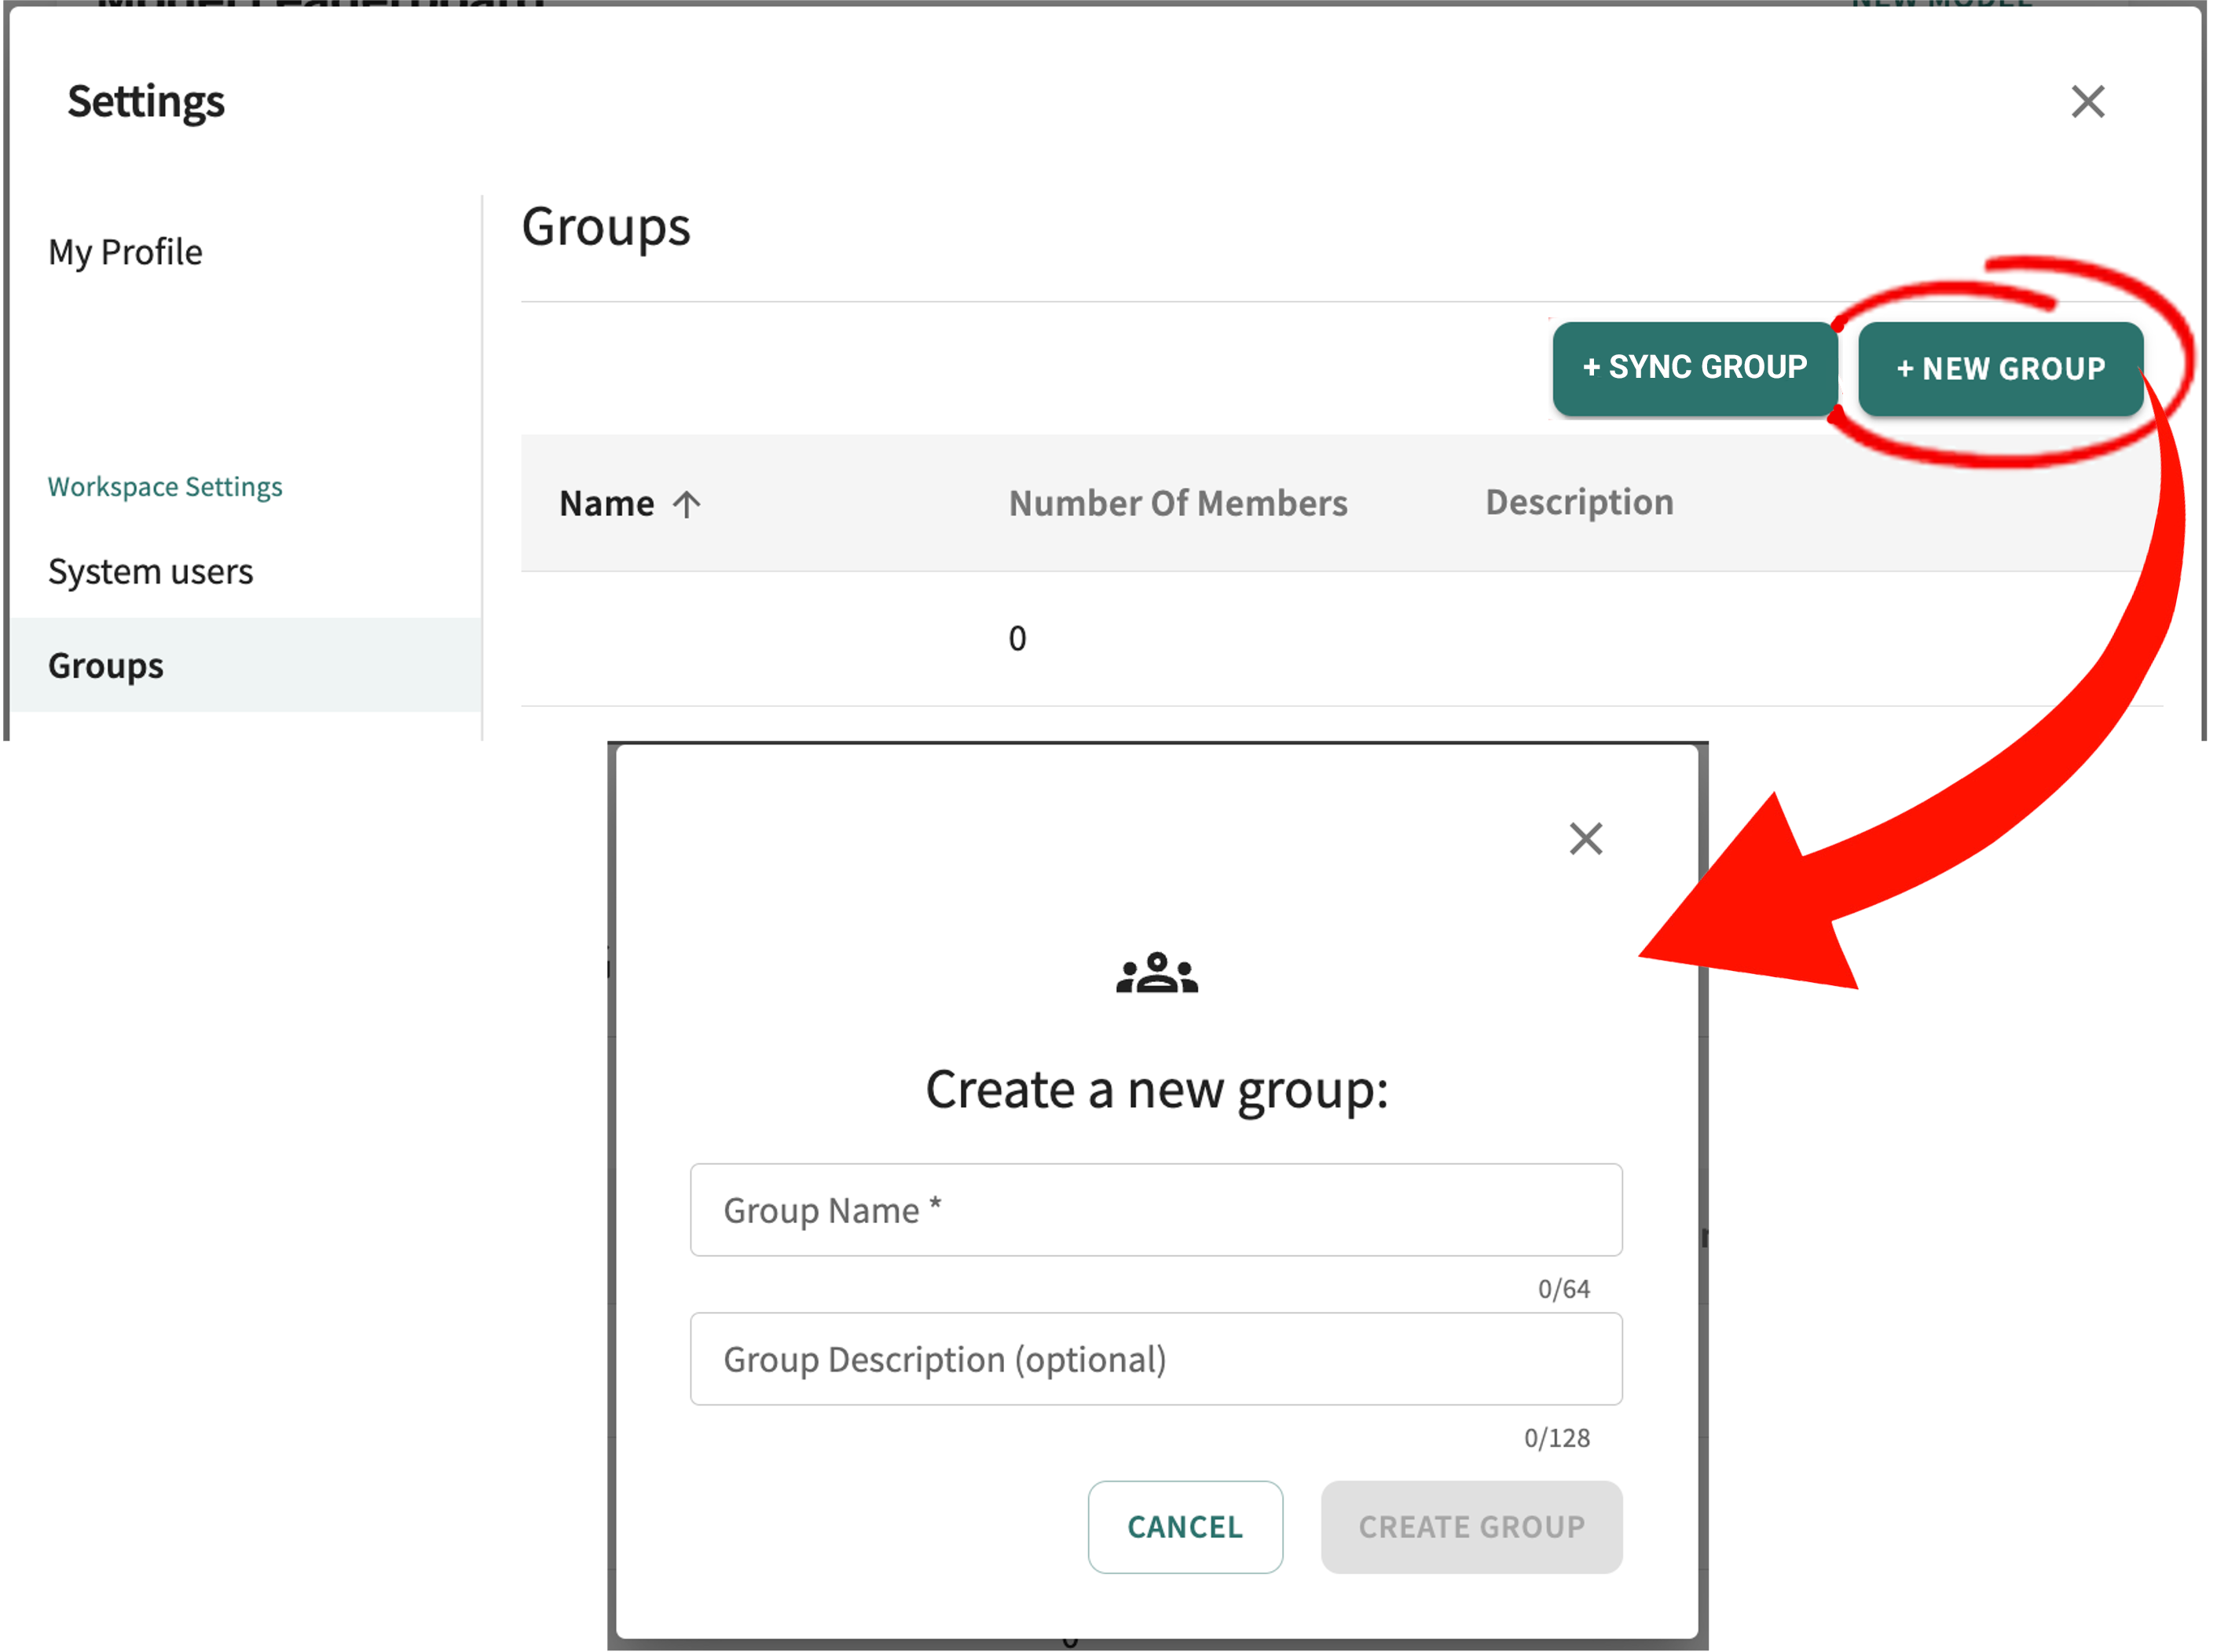
In the Create a new group popup:
- Enter a Group Name (required)
- Enter a Group Description (optional)
- Click CREATE GROUP.
Your new group is now added to the top of the list on the Groups page.
Adding Group Members
On the Groups page, click the Name of the group to which you want to add members, then click ADD MEMBERS.
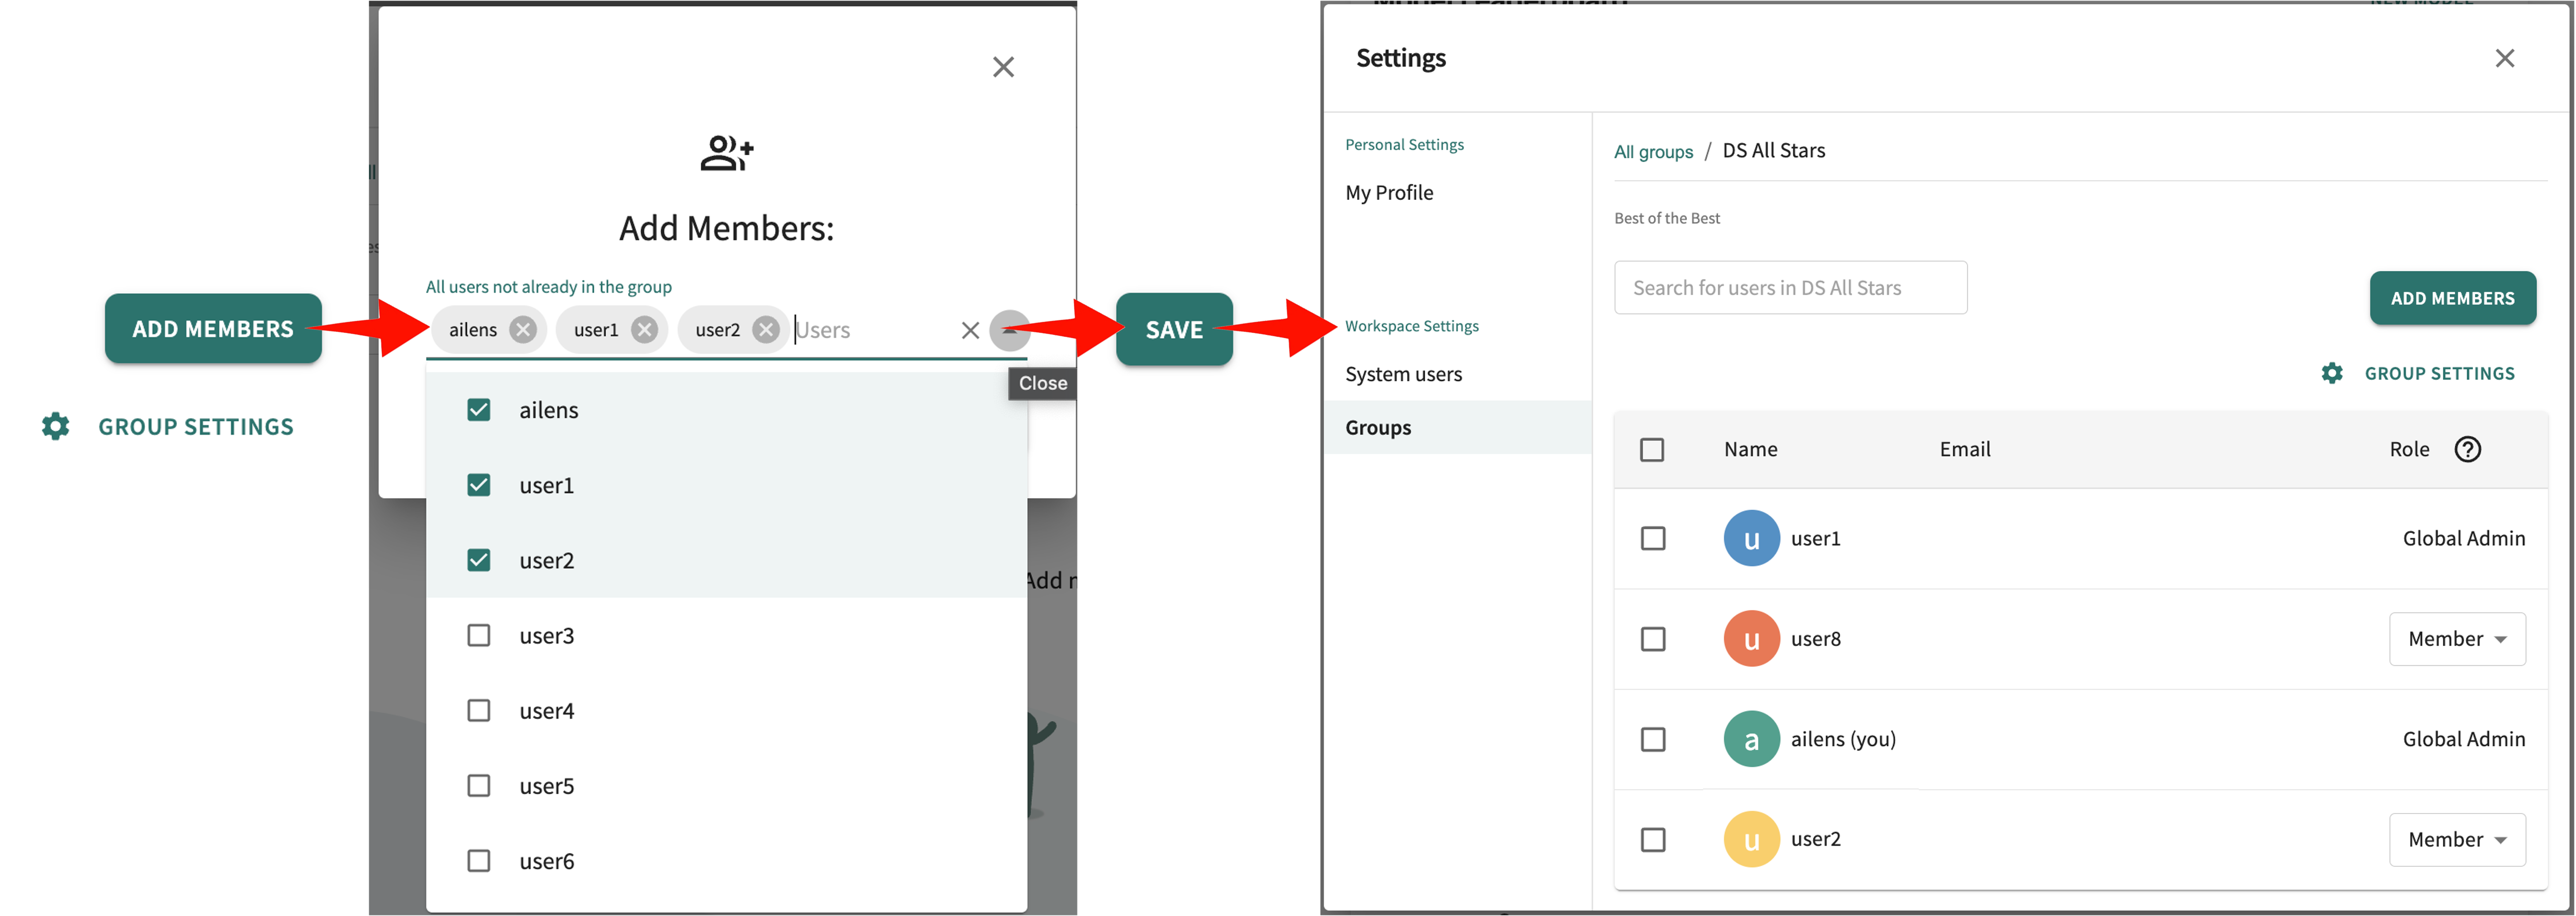
Select the Users you wish to add to the group (or search and select), then click SAVE.
Assigning Member Roles
Group roles consist of Member and Group Administrator. A Member is granted the standard permissions assigned to the group as a whole. A Group Administrator is granted additional rights to add/remove members from the group.
A Global Admin retains overall rights to manage the group.
To change a member role, click the respective selector in the Role column, then click the desired role.
Removing a Group Member
To remove one or more members, enable the checkbox to the left of the Name and click REMOVE MEMBERS.
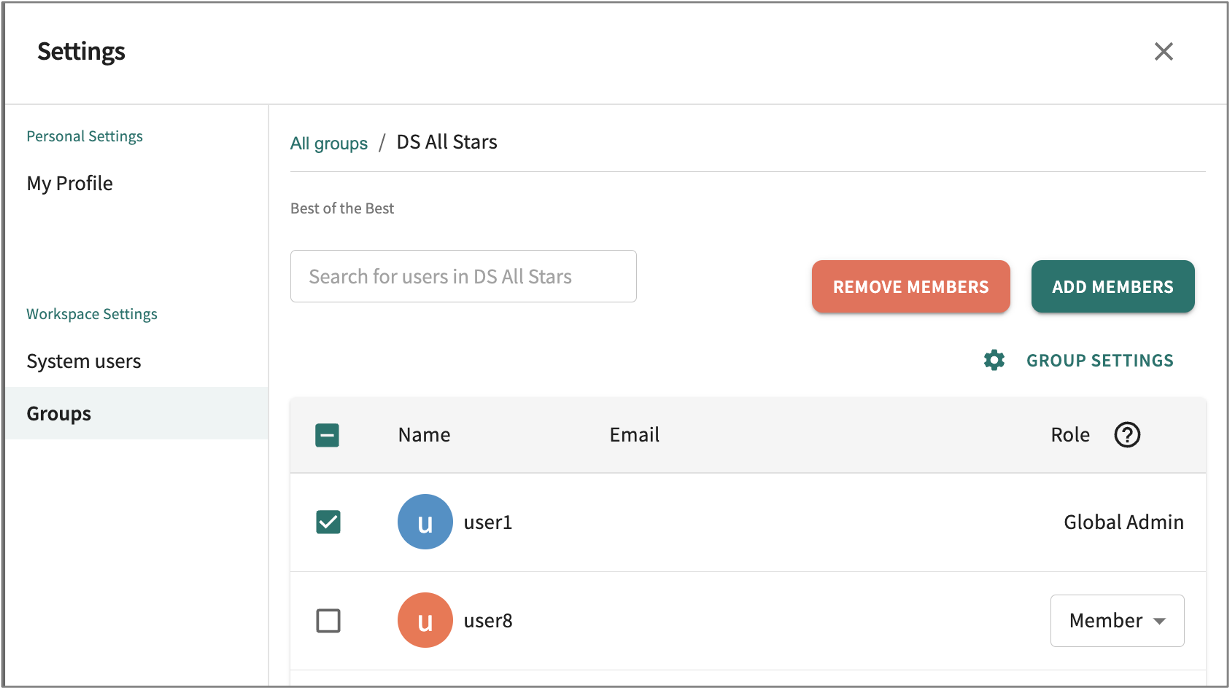
The selected members are removed from the group. Each can be added back selectively at the discretion of a Group Administrator or Global Admin.
Synchronizing Groups With Your Identity Provider
As discussed above, the Global Admin role can manually create user groups and add users to a group. When enabled, TruEra's Group Sync functionality can automatically add members from user groups already present in your identity provider directory.
To get started with Group Sync, submit a request to TruEra to enable the following support:
- Integration with your identity provider for SSO
- Configuration of the TruEra SSO app for Group Sync using SAML claims.OIDC claim/assertion that can be treated as a single attribute statement about a subject; a set of claims is called a scope.
Once your request is approved, SSO is enabled by TruEra according to the Group ID mapped from your identity provider. When you receive confirmation that TruEra SSO has been enabled:
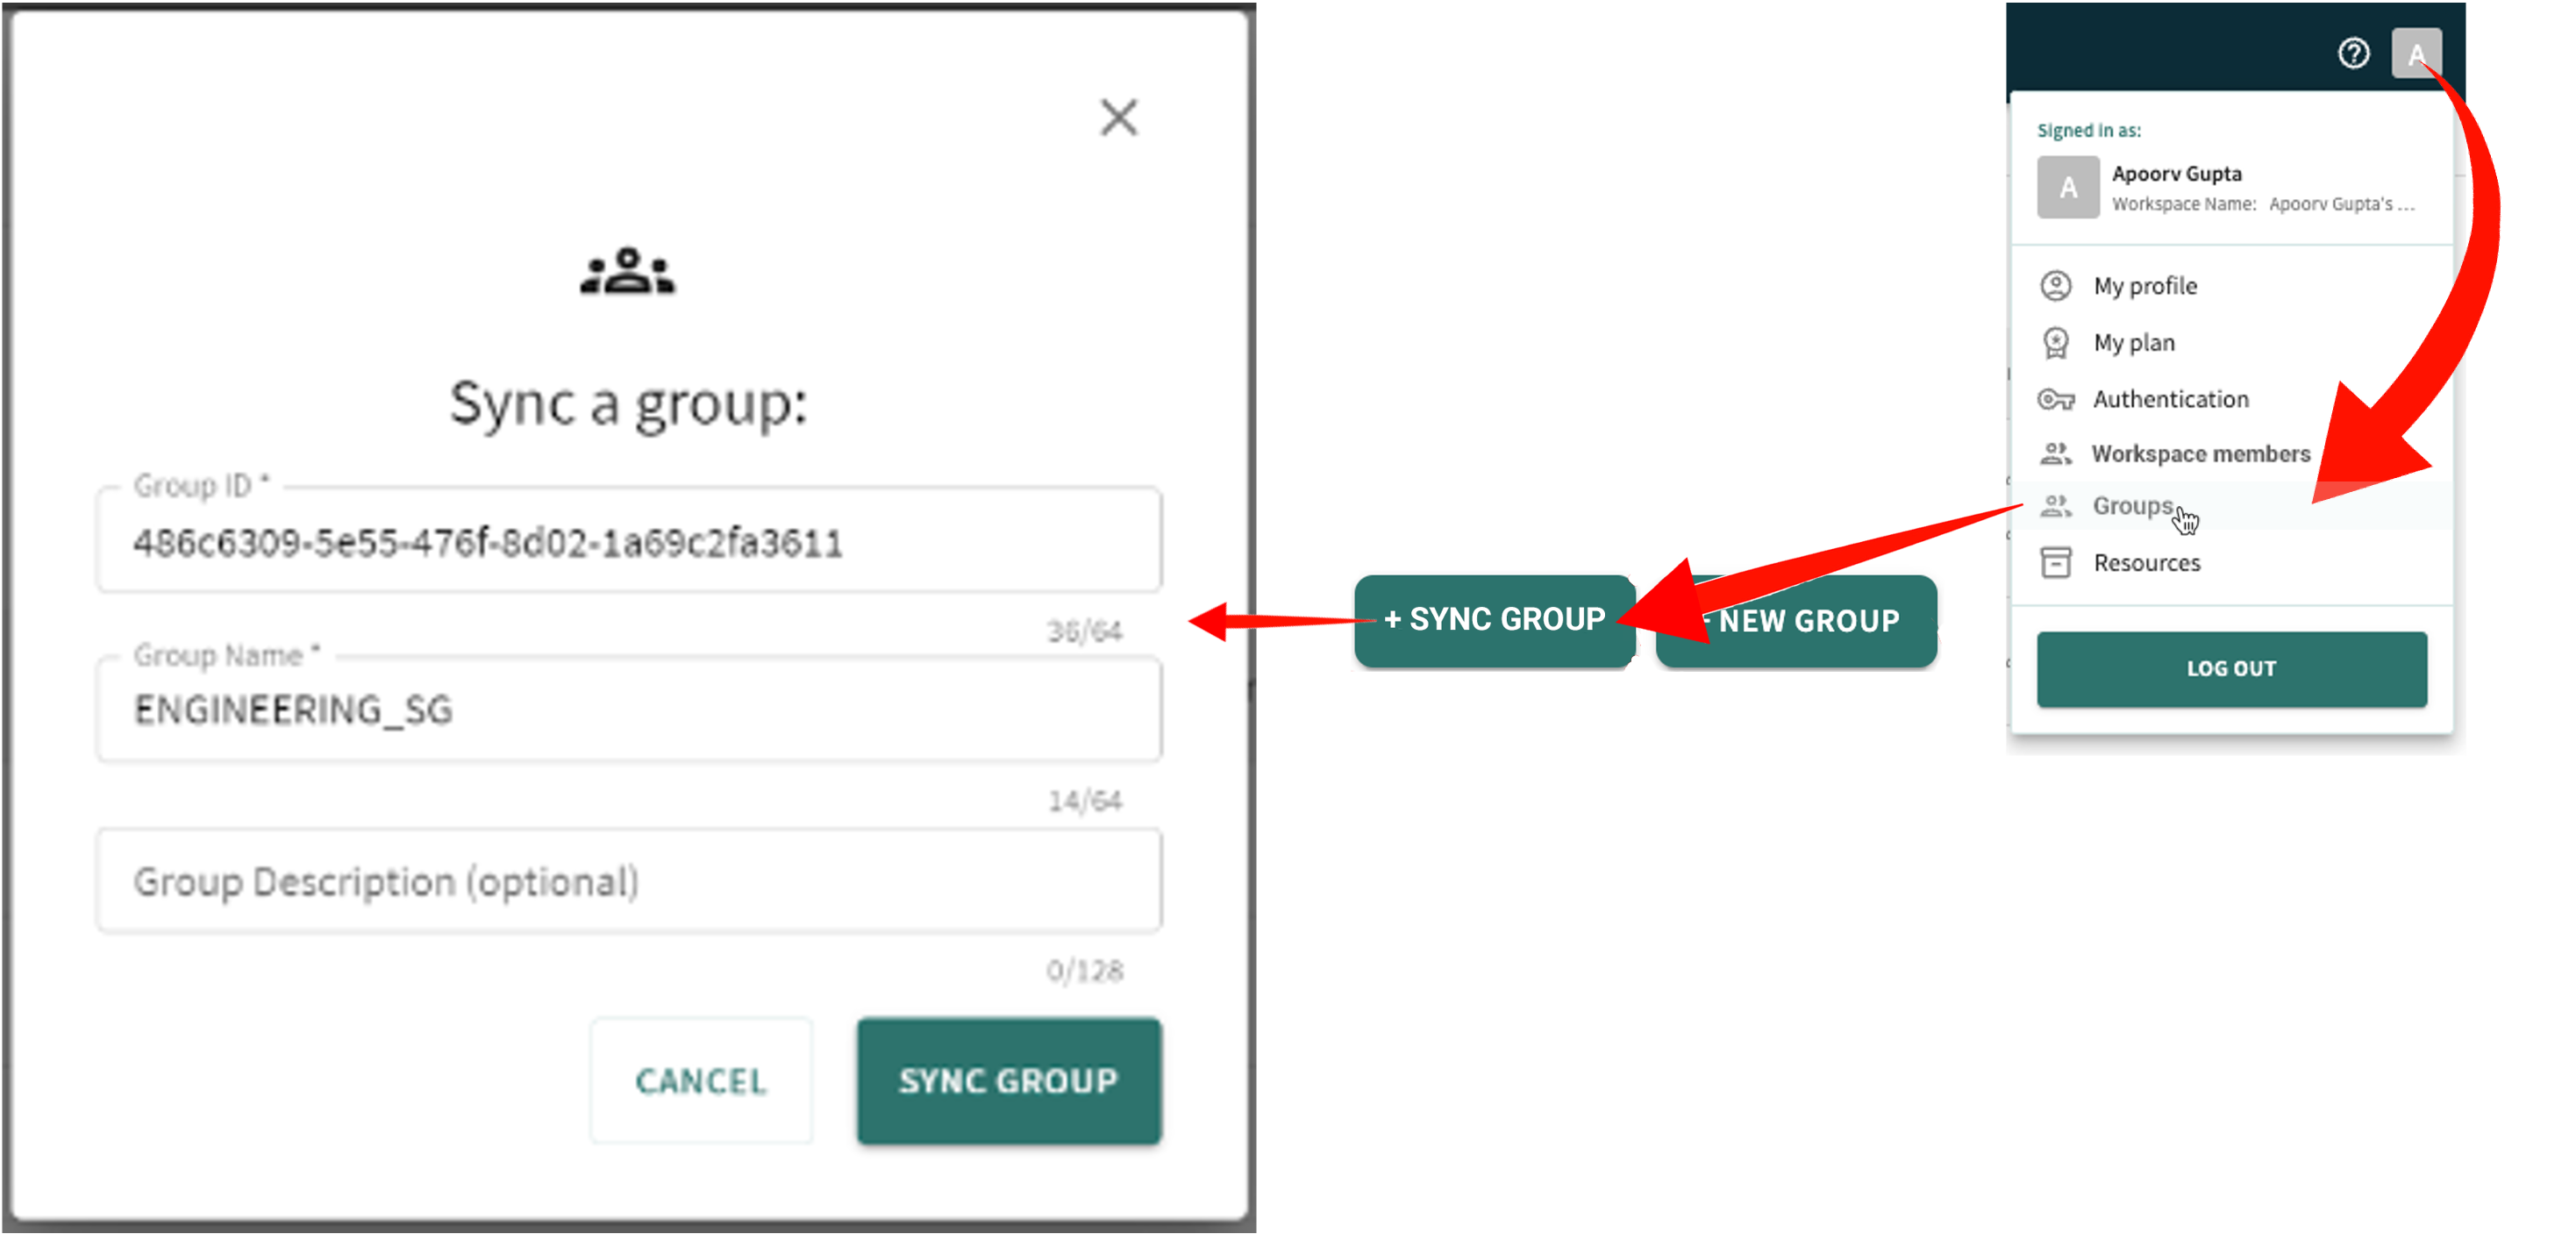
- Click your avatar at the top-right of the page.
- Select Groups.
- Click + SYNC GROUP.
- As provided by TruEra, enter the Group ID and Group Name.
- Enter an optional Group Description.
- Click SYNC GROUP to record your changes or click CANCEL to abort the Group Sync.
Properly SSO-authenticated users will be added to the this group automatically when they next sign in.
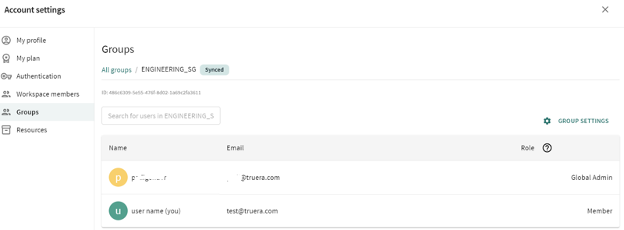
Click GROUP SETTINGS to make modifications, as desired.
Managing Project Collaborators
Project Collaborators are granted access to a specific project, either as the project Owner, a project User, or a Read-Only observer.
The project Owner can:
- add an active System User to the project
- remove a project User from the project
- promote a different project User to Owner, thereby reliquishing owership
- delete the project entirely.
Note
An Admin is also authorized to delete a project in the project owner's absence.
To manage project access as a project Owner, if not already selected, open the project, then click SHARE.
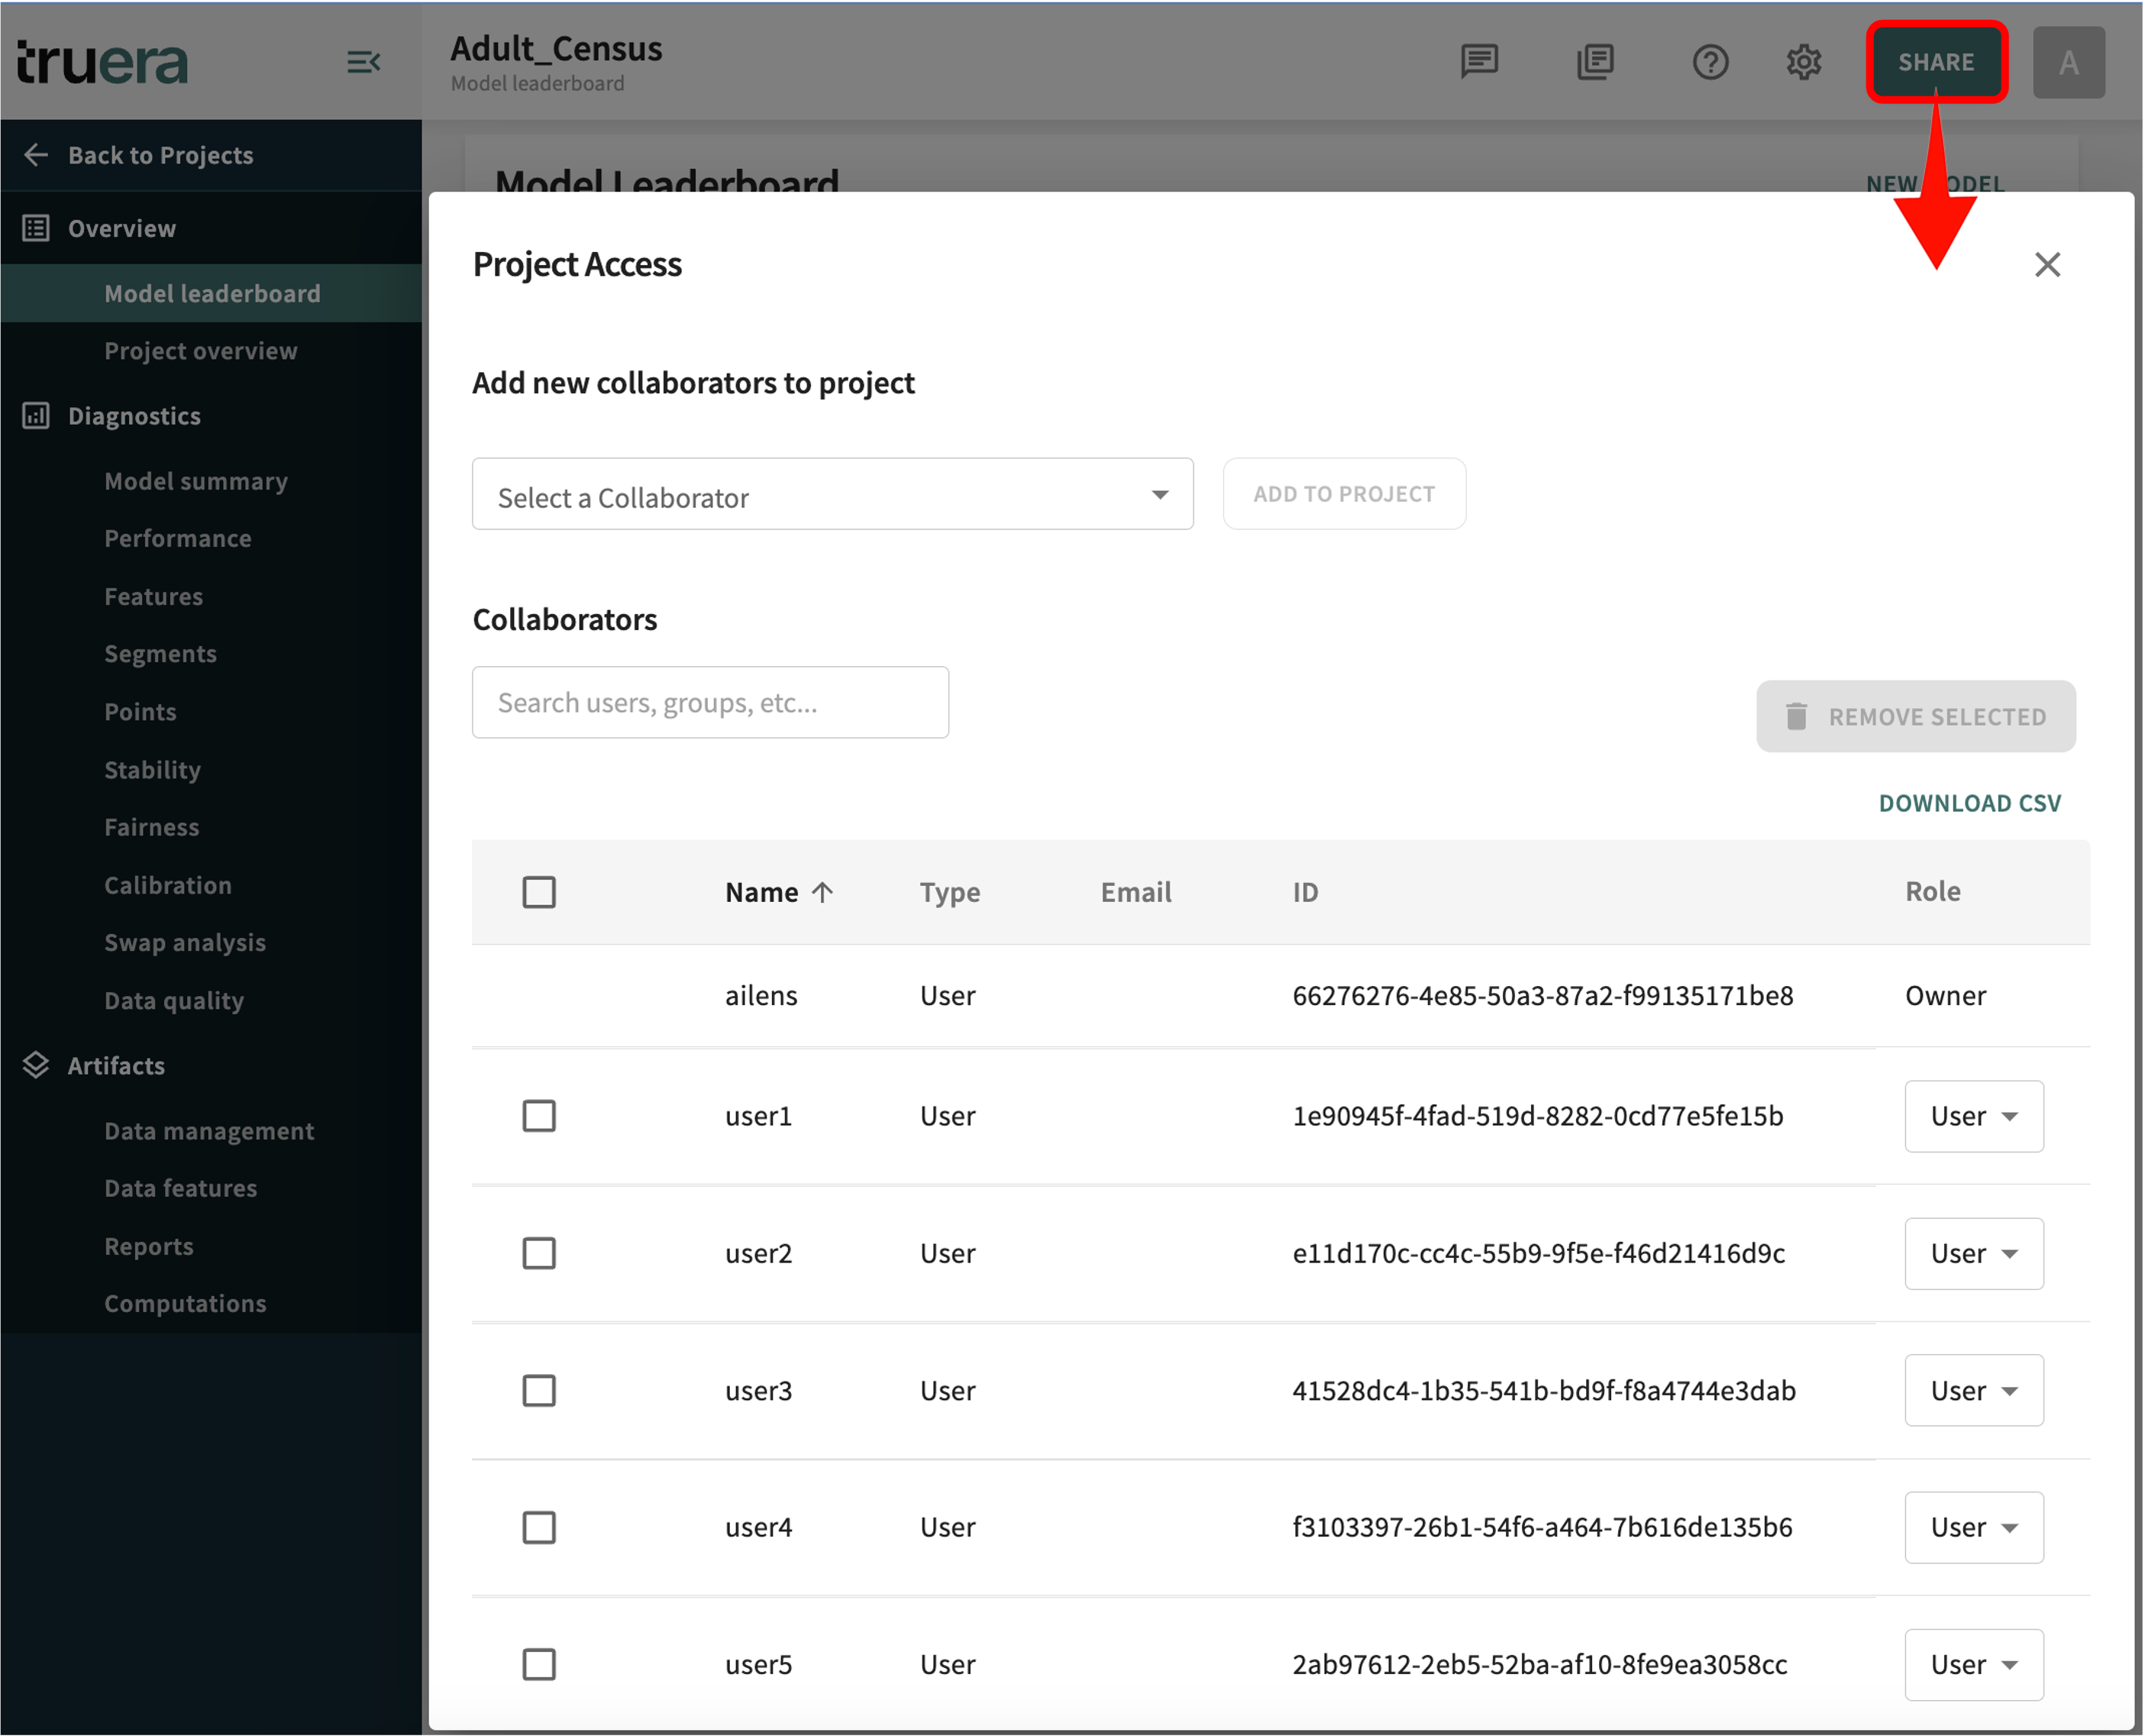
Adding a User to the Project
To add a user, choose a name from the Select a Collaborator drop-down list at the top of the Project Access page. Alternatively, you can enter a partial or full search string in the Search users, groups, etc... input field. Select the desired user, then click ADD TO PROJECT.

Tip
When the list of project users is long, you can export it to a CSV file for offline examination by cicking DOWNLOAD CSV.
Changing a User's Project Role
To change a project Role, click the role selector for the desired user Name and select the new role — Owner, User, or Read-Only.
Remember, the Owner has the most expansive permissions, including adding/removing project users. A project User receives permissions to change the project's parameters and attributes — add/remove models and data, set/change scoring metrics, perform analytics, and so forth, while the Read-Only project role has the most restrictive permissions and is really more of an an observer role.

Changes are reflected in the Role column. In the case of a newly designated owner, the role changes to Owner, while the previous owner's role changes to User.
Removing a Project User
To remove one or more users from the project:
- Enable the checkbox to the right of the Name
- Click REMOVE SELECTED.
The selected users are removed from the Collaborators list.