SageMaker Scheduled Pull
In this quickstart, we'll go through the process of setting up a SageMaker model endpoint for TruEra Monitoring.
Overview
Here's an outline of the steps to take in setting up your SageMaker model endpoint:
- Prepare the data and train the model in SageMaker.
- Deploy this model to a SageMaker endpoint with Data Capture enabled.
- Wait for Data Capture to start monitoring your model, capturing endpoint inputs and outputs, and then writing them to an S3 bucket. TruEra will ingest from this bucket.
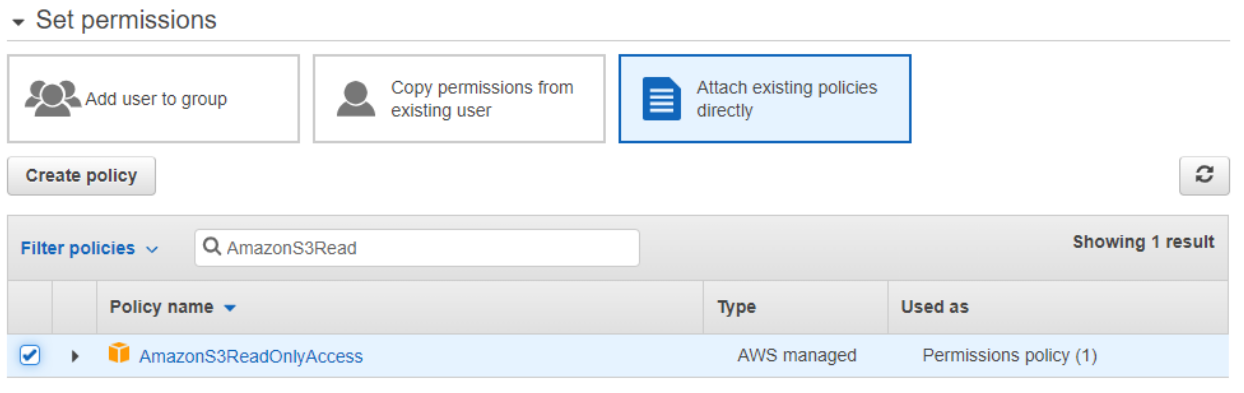
- Create an IAM user with read permissions. After adding the IAM user credentials, you can then setup a corresponding project in TruEra.
- Finally with all the pieces in place, enable TruEra monitoring on the SageMaker endpoint.

Given a trained model deployed at a SageMaker endpoint, Data Capture writes both incoming inference data and model predictions into a specified S3 location. Setting up TruEra monitoring in this context sets up scheduled ingestion, which at defined intervals will read from S3 and parsed the data capture logs. The parsed data is then ingested and appended to a data split, which then can be consumed by downstream services.
Prerequisites
Ensure that AWS console access is available, particularly for SageMaker, S3, and IAM.
Make sure the Python SDK is already installed in your SageMaker environment. See Getting Access to TruEra for instructions.
We will be following an Amazon SageMaker tutorial to build, train and deploy a machine learning model, which trains an XGBoost model on the Bank Marketing Data Set. The steps will be the exact same up until the deployment step.
If you have already prepared your data and trained a model, you can skip to Step 1.
(Optional) Step 0: Prepare data and train model
Prepare the data
In this step we prepare the data and upload to S3. For more details, please refer to the official tutorial.
# import libraries
import boto3, re, sys, math, json, os, sagemaker, urllib.request
from sagemaker import get_execution_role
import numpy as np
import pandas as pd
import matplotlib.pyplot as plt
from IPython.display import Image
from IPython.display import display
from time import gmtime, strftime
from sagemaker.predictor import csv_serializer

# Define IAM role
role = get_execution_role()
prefix = 'sagemaker/DEMO-xgboost-dm'
my_region = boto3.session.Session().region_name # set the region of the instance

# this line automatically looks for the XGBoost image URI and builds an XGBoost container.
xgboost_container = sagemaker.image_uris.retrieve("xgboost", my_region, "latest")

print("Success - the MySageMakerInstance is in the " + my_region + " region. You will use the " + xgboost_container + " container for your SageMaker endpoint.")
bucket_name = 'your-s3-bucket-name' # <--- CHANGE THIS VARIABLE TO A UNIQUE NAME FOR YOUR BUCKET
s3 = boto3.resource('s3')
try:
    if  my_region == 'us-east-1':
      s3.create_bucket(Bucket=bucket_name)
    else:
      s3.create_bucket(Bucket=bucket_name, CreateBucketConfiguration={ 'LocationConstraint': my_region })
    print('S3 bucket created successfully')
except Exception as e:
    print('S3 error: ',e)
try:
  urllib.request.urlretrieve ("https://d1.awsstatic.com/tmt/build-train-deploy-machine-learning-model-sagemaker/bank_clean.27f01fbbdf43271788427f3682996ae29ceca05d.csv", "bank_clean.csv")
  print('Success: downloaded bank_clean.csv.')
except Exception as e:
  print('Data load error: ',e)

try:
  model_data = pd.read_csv('./bank_clean.csv',index_col=0)
  print('Success: Data loaded into dataframe.')
except Exception as e:
    print('Data load error: ',e)
train_data, test_data = np.split(model_data.sample(frac=1, random_state=1729), [int(0.7 * len(model_data))])
print(train_data.shape, test_data.shape)
Train the ML model
In this step we train a XGBoost model on the prepared data. For more details, please refer to the official tutorial.
pd.concat([train_data['y_yes'], train_data.drop(['y_no', 'y_yes'], axis=1)], axis=1).to_csv('train.csv', index=False, header=False)
boto3.Session().resource('s3').Bucket(bucket_name).Object(os.path.join(prefix, 'train/train.csv')).upload_file('train.csv')
s3_input_train = sagemaker.inputs.TrainingInput(s3_data='s3://{}/{}/train'.format(bucket_name, prefix), content_type='csv')
sess = sagemaker.Session()
xgb = sagemaker.estimator.Estimator(xgboost_container,role, instance_count=1, instance_type='ml.m4.xlarge',output_path='s3://{}/{}/output'.format(bucket_name, prefix),sagemaker_session=sess)
xgb.set_hyperparameters(max_depth=5,eta=0.2,gamma=4,min_child_weight=6,subsample=0.8,silent=0,objective='binary:logistic',num_round=100)
xgb.fit({'train': s3_input_train})
Step 1: Deploy the Model with DataCapture Enabled
Now that we have a trained model, we are ready to deploy it. To enable TruEra monitoring, we need to make sure our endpoint is logging the inputs and outputs of the model via Data Capture.
from sagemaker.model_monitor import DataCaptureConfig

# Set to True to enable data capture
enable_capture = True

# Optional - Sampling percentage. Choose an integer value between 0 and 100
sampling_percentage = 100

# Optional - The S3 URI of where to store captured data in S3
s3_capture_upload_path = f's3://{bucket_name}/data_capture'

# Capture both Input and Output
capture_modes = ['REQUEST','RESPONSE']

# Configuration object passed in when deploying Models to SM endpoints
data_capture_config = DataCaptureConfig(
    enable_capture = enable_capture,
    sampling_percentage = sampling_percentage,
    destination_s3_uri = s3_capture_upload_path,
    capture_options = capture_modes
)
Now that we have configured data capture, we can now deploy the model to an endpoint.
endpoint_name = 'sagemaker-monitoring' # It is helpful to give our endpoint a name

xgb_predictor = xgb.deploy(
    initial_instance_count=1,
    instance_type='ml.m4.xlarge',
    data_capture_config = data_capture_config,
    endpoint_name=endpoint_name
)
Let's make sure our model is working using the test data.
from sagemaker.serializers import CSVSerializer

test_data_array = test_data.drop(['y_no', 'y_yes'], axis=1).values #load the data into an array
xgb_predictor.serializer = CSVSerializer() # set the serializer type
predictions = xgb_predictor.predict(test_data_array).decode('utf-8') # predict!
predictions_array = np.fromstring(predictions[1:], sep=',') # and turn the prediction into an array
print(predictions_array.shape)
Step 2: Create a TruEra Monitoring Project
Let's head back to TruEra and setup a project.
This example uses BasicAuthentication, but you may want to use a different authentication. Refer to API Authentication for additional details.
TRUERA_URL = "<TRUERA_URL>"
USERNAME = "<USERNAME>"
PASSWORD = "<PASSWORD>"
from truera.client.truera_workspace import TrueraWorkspace
from truera.client.truera_authentication import BasicAuthentication

auth = BasicAuthentication(USERNAME, PASSWORD)
tru = TrueraWorkspace(TRUERA_URL, auth)
Let's create a project and add a data collection. For more details, refer to the Monitoring Quickstart
project_name = "SageMaker-Monitoring"
tru.add_project(project_name, score_type="logits")
data_collection_name = "BankMarketingDataSet"
tru.add_data_collection(data_collection_name)
For simplicity, we will be using a virtual model. Please refer to Model Ingestion for more details.
model_name = "sagemaker-xgboost"
tru.add_model(model_name)
We can also add a train split. This is very helpful as it enables various diagnostic metrics to be computed, as well as providing our data collection with a schema so that we don't have to manually pass one in.
from truera.client.ingestion import ColumnSpec

column_names = train_data.columns

train_data.index.name = "id"
tru.add_data(
    train_data,
    data_split_name="train",
    column_spec=ColumnSpec(
        id_col_name="id",
        pre_data_col_names=column_names
    )
)
Step 3: Providing TruEra Access to AWS Resources
Now that data capture is enabled, we are ready to setup monitoring. However, this would require TruEra to be able to access the data capture information in AWS. We need to provide AWS credentials so that TruEra can perform these actions on your behalf. We highly recommend using AWS IAM Roles for this purpose.
credential_name = "SageMakerDataCaptureS3Access"

ingestion_client = tru.get_ingestion_client()

ingestion_client.add_credential(
    name=credential_name,
    secret=None,
    identity=None,
    is_aws_iam_role=True
)
The IAM Role will need be able to read from the data capture S3 bucket. In this example, we give S3 read access over all buckets, but you can limit access to the data capture bucket only.
Finally, we update the credential in the TruEra system with the role ARN. Please refer to the documentation on IAM Roles for more detailed instructions.
ingestion_client.update_credential(
    name=credential_name,
    secret="arn:aws:iam::123456789012:role/ExampleRole",
    identity=None
)
Step 4: Setup Monitoring
Now that we have a project with a data collection, model, and credentials, we are ready to start monitoring. We need to first grab the S3 URI corresponding to our Data Capture configuration. It can be found by navigating to Amazon Sagemaker -> Inference -> Endpoint configurations and selecting the endpoint. The S3 URI will be under Data capture. The full URI will be the data capture URI along with the endpoint name and variant name (usually AllTraffic).
variant_name = "AllTraffic"
S3_DATACAPTURE_URI =f"s3://{bucket_name}/data_capture/{endpoint_name}/{variant_name}/"
split_name = f"{endpoint_name}_monitoring"
from truera.client.integrations.sagemaker import setup_monitoring

column_spec = ColumnSpec(
    id_col_name=None, # Placeholder, field will be automatically filled in
    pre_data_col_names=column_names
)

workflow_id = setup_monitoring(
    tru,
    split_name=split_name,
    datacapture_uri=S3_DATACAPTURE_URI,
    credential_name=credential_name,
    column_spec=column_spec
)
Further examples
SageMaker monitoring by default ingests every hour. A different cadence (in this case every 15 mins) can be specified by passing a cron schedule as a string. Crontab is a useful tool that can be used to create cron schedules.
workflow_id = setup_monitoring(
    tru,
    split_name=split_name,
    datacapture_uri=S3_DATACAPTURE_URI,
    credential_name=credential_name,
    column_spec=column_spec,
    cron_schedule="*/15 * * * *"
)
The data collection was provided a schema when we ingested the training split. If a schema was not added to data collection beforehand, one can be passed in during monitoring setup. While only column_spec is necessary, any column without an explicit data type mapping will be inferred.
from truera.protobuf.public.util.data_type_pb2 import INT64

column_names = train_data.columns

workflow_id = setup_monitoring(
    tru,
    split_name=split_name,
    datacapture_uri=S3_DATACAPTURE_URI,
    credential_name=credential_name,
    column_spec=column_spec,
    column_data_types={c: INT64 for c in column_names}
)