Monitoring Quickstart
In this quickstart, you'll create a monitoring dashboard that can be accessed by a URL.
Before you begin – Important Information
Interested in TruEra Monitoring? Request a demo and early access at https://go.truera.com/get-demo.
Restrictions
The dataset used here is hosted under the Creative Commons 4.0 license by UCI. It is distributed in the hope that it will be useful, but WITHOUT ANY WARRANTY; without even the implied warranty of MERCHANTABILITY or FITNESS FOR A PARTICULAR PURPOSE. See the Creative Commons 4.0 License for more details:
System Requirements
Although TruEra's Python SDK can interact with web services via the Python environment of your choice, before continuing with installation, please review the system requirements for installing the TruEra package here.
To get started quickly with TruEra Monitoring, make sure the Python SDK is installed (see Installation and Access), then complete each of the following steps:
- Connect to TruEra and create your workspace.
- Download and process the sample data provided.
- Set up a TruEra Diagnostics project for subsequent model analysis, bearing in mind that a monitoring dashboard can track models from more than one Diagnostics project.
- Add a data collection and model to the project.
- Ingest the simulated prod data into the production datastore.
- Ingest custom metrics (optional).
- Create a dashboard.
Guidance follows below for each step in the sequence outlined above.
Step 1. Connect and Create Your Workspace
To access TruEra Monitoring, you'll need a TruEra account. Sign-up/sign-in at app.truera.net.
Next, generate your authentication, connect via SDK, and create your workspace. Here's how:
- Open your avatar in the Web App toolbar (pictured below in the top-left).
-
Click Authentication, then click GENERATE CREDENTIALS.
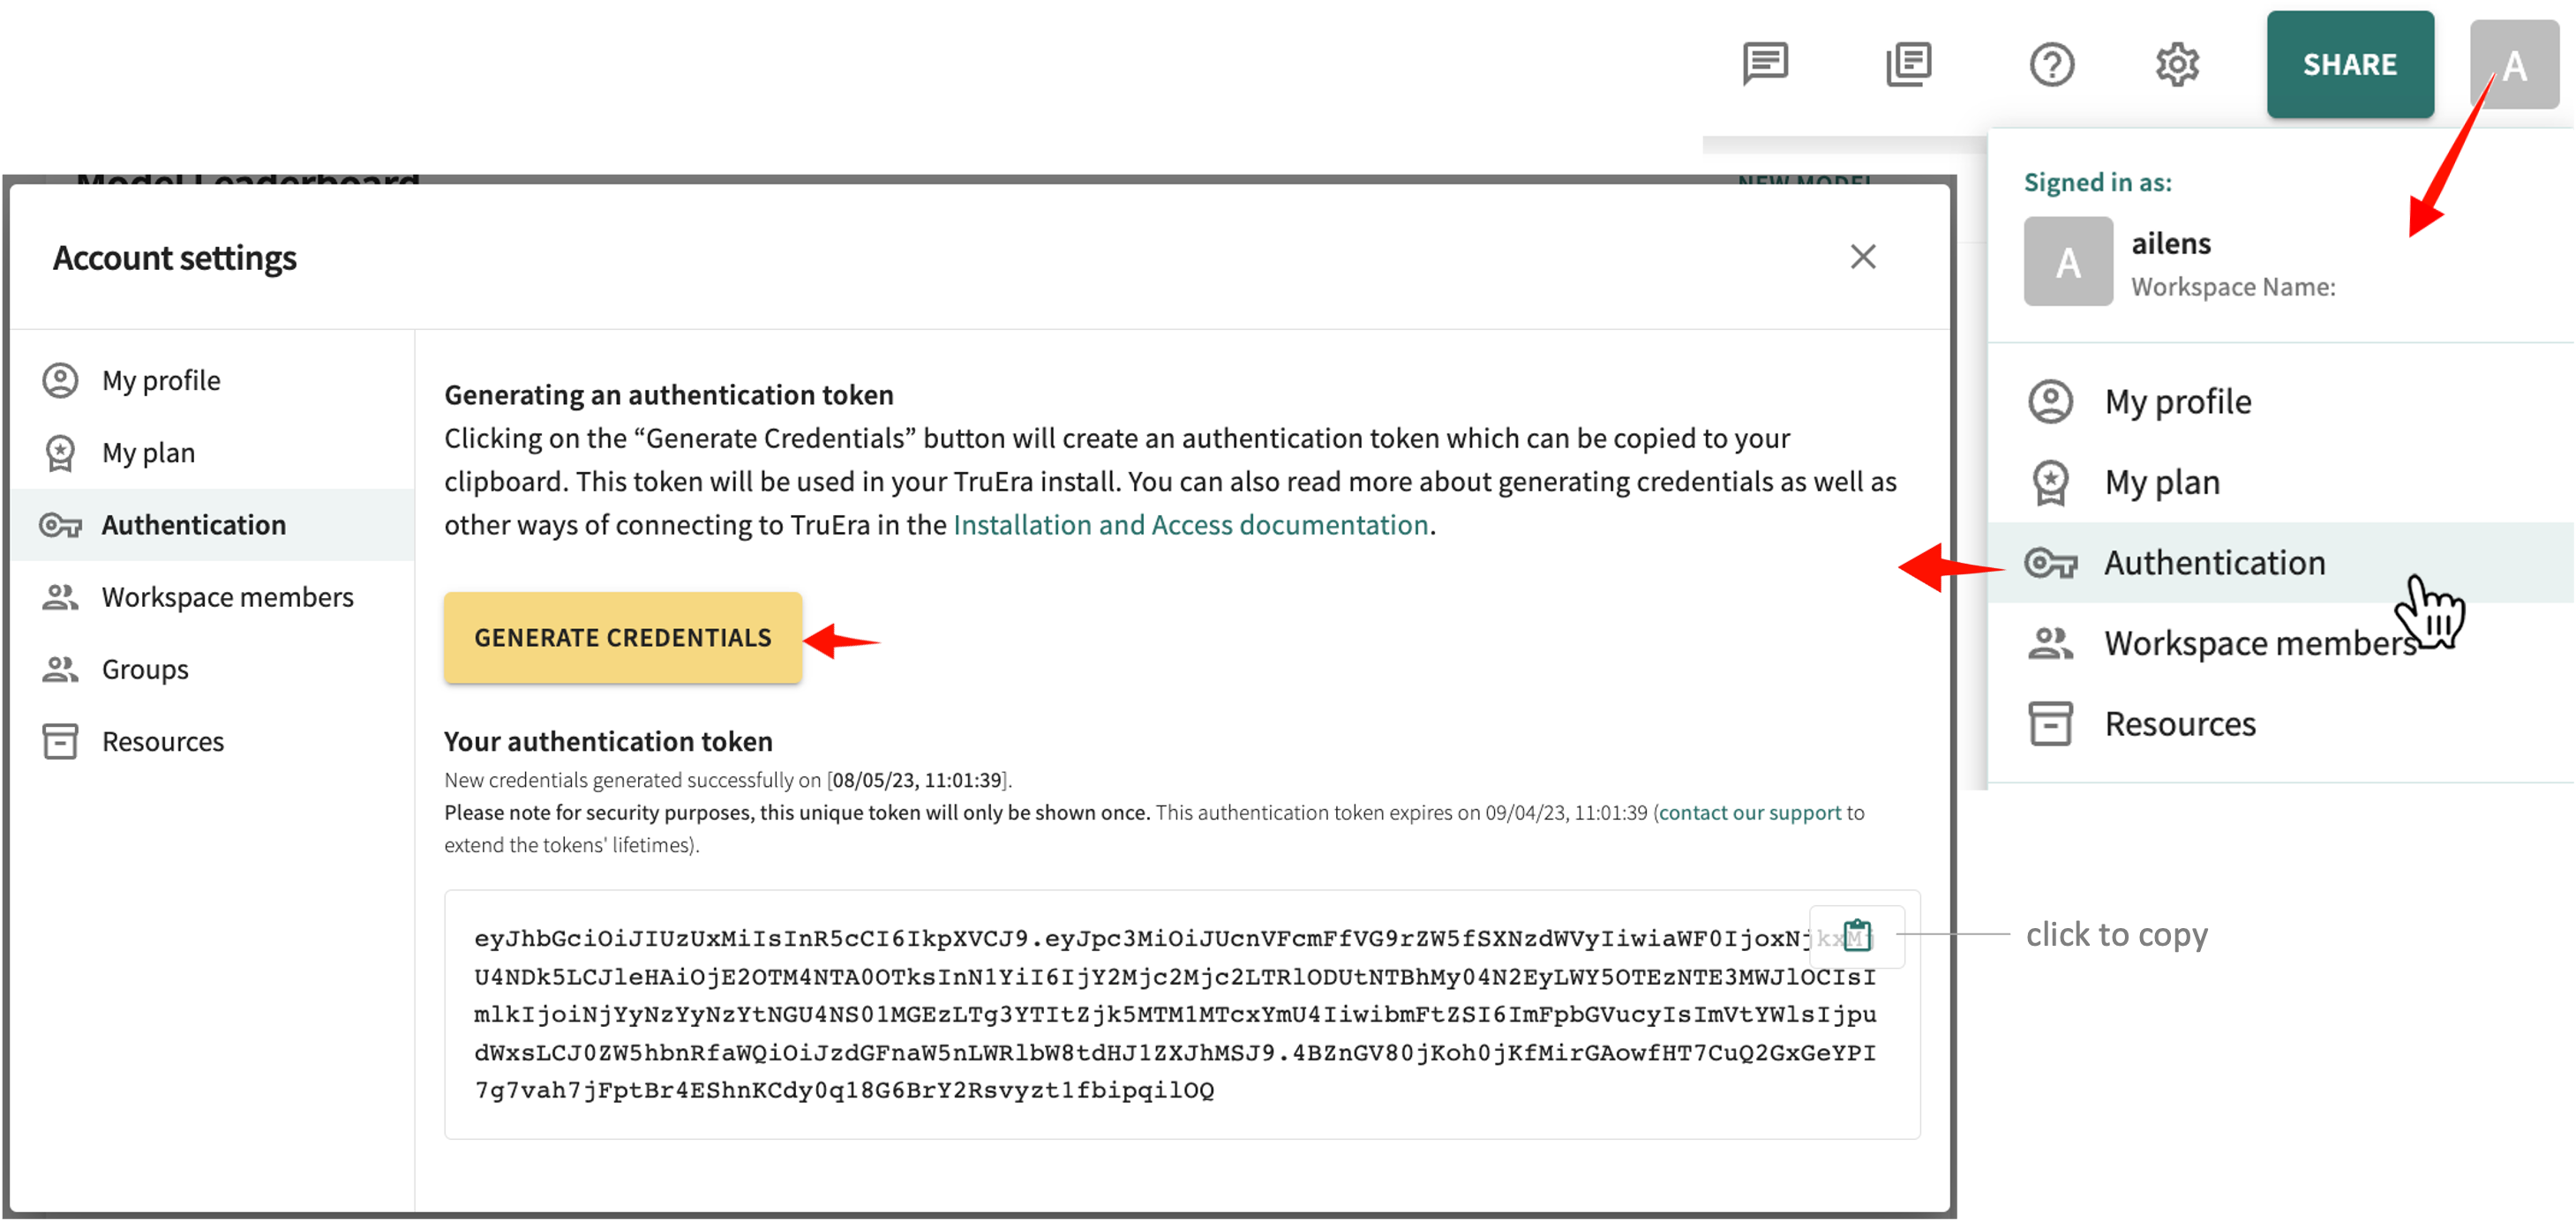
click and hold to enlarge -
Click the clipboard icon to copy the token.
- Connect and authenticate using the Python SDK by replacing
your-auth-tokenin the code snippet below with the copied token.
TRUERA_URL = "https://app.truera.net"
AUTH_TOKEN = "your-auth-token"

from truera.client.truera_workspace import TrueraWorkspace
from truera.client.truera_authentication import TokenAuthentication

auth = TokenAuthentication(AUTH_TOKEN)
tru = TrueraWorkspace(TRUERA_URL, auth, ignore_version_mismatch=True)
You're now ready to download the sample data provided.
Two sample projects are provided by TruEra for download — Housing Price Forecast and Diabetes Readmission.
Step 2. Download and Process Sample Data
Throughout this quickstart, you'll work with the Diabetes Readmission project. It includes a formatted version of the data and a pickled scikit-learn Python classification model to illustrate the model ingestion process. For other frameworks, the process is similar.
Regression Models
See Monitoring Quickstart for Regression Models in the Jupyter Notebook Library for guidance on getting started quickly with a sample regression model and data.
Add the sample model and dataset to your remote workspace as follows:
import pandas as pd
import numpy as np
from itertools import combinations

# common parameters & constants
_ID_COLUMN_NAME = 'id'
_TIMESTAMP_COLUMN_NAME = 'timestamp'
_LABEL_COLUMN_NAME = 'readmission'
_PREDICTION_COLUMN_NAME = 'prediction'
_PREDICTION_THRESHOLD = 0.6

# prod data
prod_data = pd.read_parquet("https://quickstart-sample-data.s3.us-west-2.amazonaws.com/diabetes_readmission_v2/prod.parquet")

# If __id__ in the data, remove this.
prod_data.rename(columns={'__id__': _ID_COLUMN_NAME}, inplace=True)
Next, create a new TruEra project.
Step 3. Create a TruEra project
Add the following code to create your first project.
# adding project
project_name = "PROJECT_NAME_X" # Replace with a project name of your choice
if project_name not in tru.get_projects():
    tru.add_project(project=project_name, score_type="probits")
else:
    tru.set_project(project_name)
Step 4. Add a Data Collection and Model
Give the model a name and associate it with a data collection.
MODEL_NAME = "lr"

data_collection_name = "{}_dataset".format(MODEL_NAME)

# Add data collection.
if data_collection_name not in tru.get_data_collections():
    tru.add_data_collection(data_collection_name=data_collection_name)
else:
    tru.set_data_collection(data_collection_name)

# Add models.
if MODEL_NAME not in tru.get_models():
    tru.add_model(MODEL_NAME)
else:
    tru.set_model(MODEL_NAME)
The model and data added above are now available for production monitoring as soon as you create a dashboard.
Step 5. Add Production Data
Adding production data (typically from a production datastore) requires setting a prediction threshold, creating a schema, and adding a score type. For example:
from typing import Sequence
from truera.client.ingestion.util import ColumnSpec, ModelOutputContext


def columns_excluding(df: pd.DataFrame, exclude_columns: Sequence[str]):
    column_names = df.columns.tolist()
    for column in exclude_columns:
        if column in column_names:
            column_names.remove(column)
    return column_names

def add_prediction_classification_column(data: pd.DataFrame, threshold):
    data[_PREDICTION_CLASSIFICATION_COLUMN_NAME] = ["1" if score > threshold else "0" for score in data[_PREDICTION_COLUMN_NAME] ]

pre_column_names = columns_excluding(
        prod_data, [
            _ID_COLUMN_NAME, _TIMESTAMP_COLUMN_NAME,
            _PREDICTION_COLUMN_NAME, _LABEL_COLUMN_NAME
        ]
    )

#prod data Threshold column
add_prediction_classification_column(prod_data, _PREDICTION_THRESHOLD)

# Create Schema
tru.add_production_data(
    prod_data,
    column_spec=ColumnSpec(
        id_col_name=_ID_COLUMN_NAME,
        pre_data_col_names=pre_column_names,
        label_col_names=[_LABEL_COLUMN_NAME],
        prediction_col_names=[_PREDICTION_COLUMN_NAME],
        timestamp_col_name=_TIMESTAMP_COLUMN_NAME
    ),
    model_output_context=ModelOutputContext(MODEL_NAME,score_type="probits")
)

# adding classification_score
tru.add_production_data(
    prod_data,
    column_spec=ColumnSpec(
        id_col_name=_ID_COLUMN_NAME,
        prediction_col_names=[_PREDICTION_CLASSIFICATION_COLUMN_NAME],
        timestamp_col_name=_TIMESTAMP_COLUMN_NAME
    ),
    model_output_context=ModelOutputContext(MODEL_NAME,score_type="classification")
)
Next, you have the option of ingesting custom metrics.
Step 6. Ingest Custom Metrics (optional)
Entirely optional, see Ingesting Custom Metrics for a detailed discussion and guidance on adding your own custom metrics. For purposes of this quickstart, here's a simplified template:
import datetime, time
from truera.client.metrics import getModelMetricReporter
from truera.client.metrics import getGeneralMetricReporter

# Reset the timestamp for each model to have same start time
start_time = pd.to_datetime(prod_data[_TIMESTAMP_COLUMN_NAME]).min().to_pydatetime()
end_time = pd.to_datetime(prod_data[_TIMESTAMP_COLUMN_NAME]).max().to_pydatetime()

# Add models.
if MODEL_NAME not in tru.get_models():
    tru.add_model(MODEL_NAME)
else:
    tru.set_model(MODEL_NAME)

general_metric_reporter = getGeneralMetricReporter(tru)
model_metric_reporter = getModelMetricReporter(tru)

while (start_time <= end_time):
    model_metrics = {"model_metric_1": np.random.random(), "model_metric_2": np.random.random()}
    general_metrics = {"general_metric_1": np.random.random(), "general_metric_2": np.random.random()}
    model_metric_reporter.sendMetrics(metrics=model_metrics, time=start_time)
    general_metric_reporter.sendMetrics(metrics=general_metrics, time= start_time)
    time.sleep(0.4)
    start_time = start_time + datetime.timedelta(days = 1)
You're now ready to create a dashboard to monitor your newly added sample model and data.
Click Next below to continue.